Platform Notebooks
📌 If you have any questions shoot us an email or join us on Discord! 💜
Overview
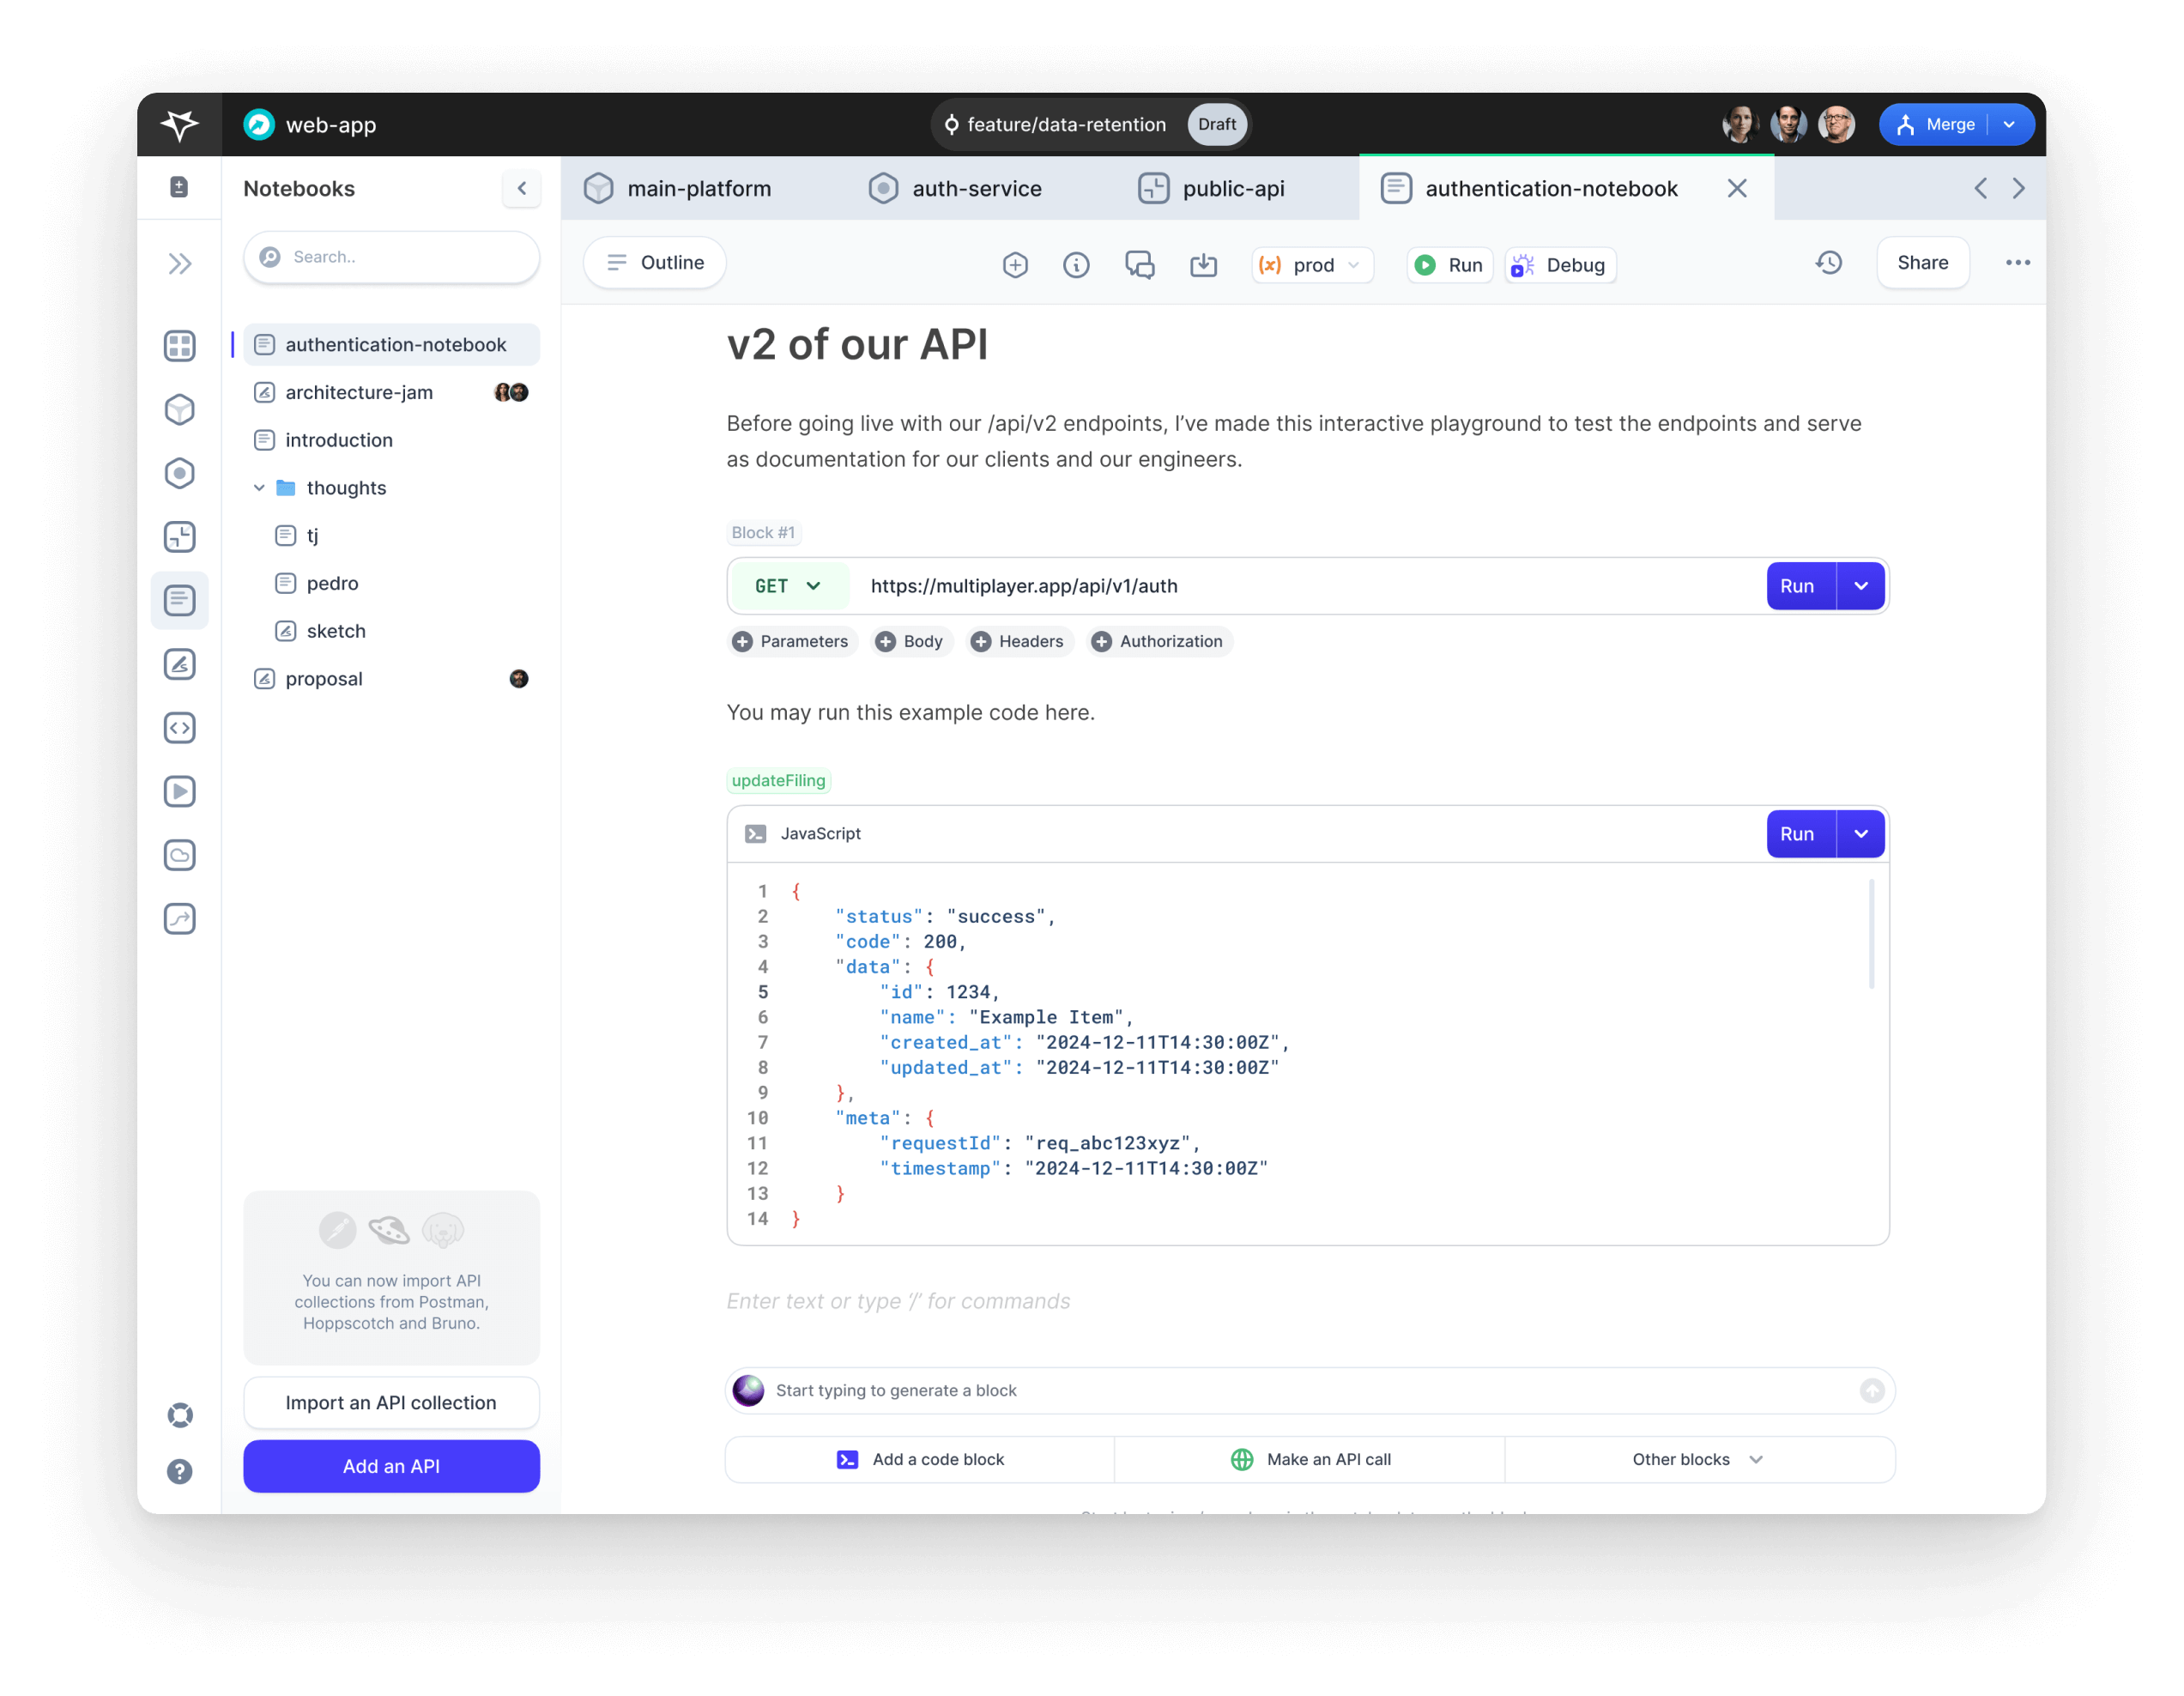
Notebooks are the ultimate tool for designing, testing, documenting, and debugging integrations—without the need for external API clients or manual scripting.
From documenting your integrations with API calls, code snippets, and step-by-step instructions to executing and debugging them in real-time, Platform Notebooks now provide all the tools you need to fully understand, test, and share knowledge about your APIs.
You can also document and centralize all your system requirements docs, system design decisions, Architectural Decision Records (ADRs), Architecture Technical Debt (ATD), etc.
Create a Notebook
- Open your project
- In the left-side menu, open “Notebooks”
- Click “Create a notebook”
- Type the notebook name
- Select "Notebook”
- Click “Create a new notebook”
You can edit your notebook at any point after its creation, all changes are autosaved.
Notebook Main Functionalities
These are the main functionalities in Notebooks:
- Create Text Blocks to document step by step instructions, system requirements, system design decisions, Architectural Decision Records (ADRs), technical debt, etc.
- Create Executable Blocks to design, document, and sequence API and snippets of code.
- Run the Executable blocks to test your API and Code blocks.
- Live Debugging with Platform Debugger. Enable deep session replays to get full visibility into what’s happening in your backend while executing API calls and scripts.
Notebook Top Navigation
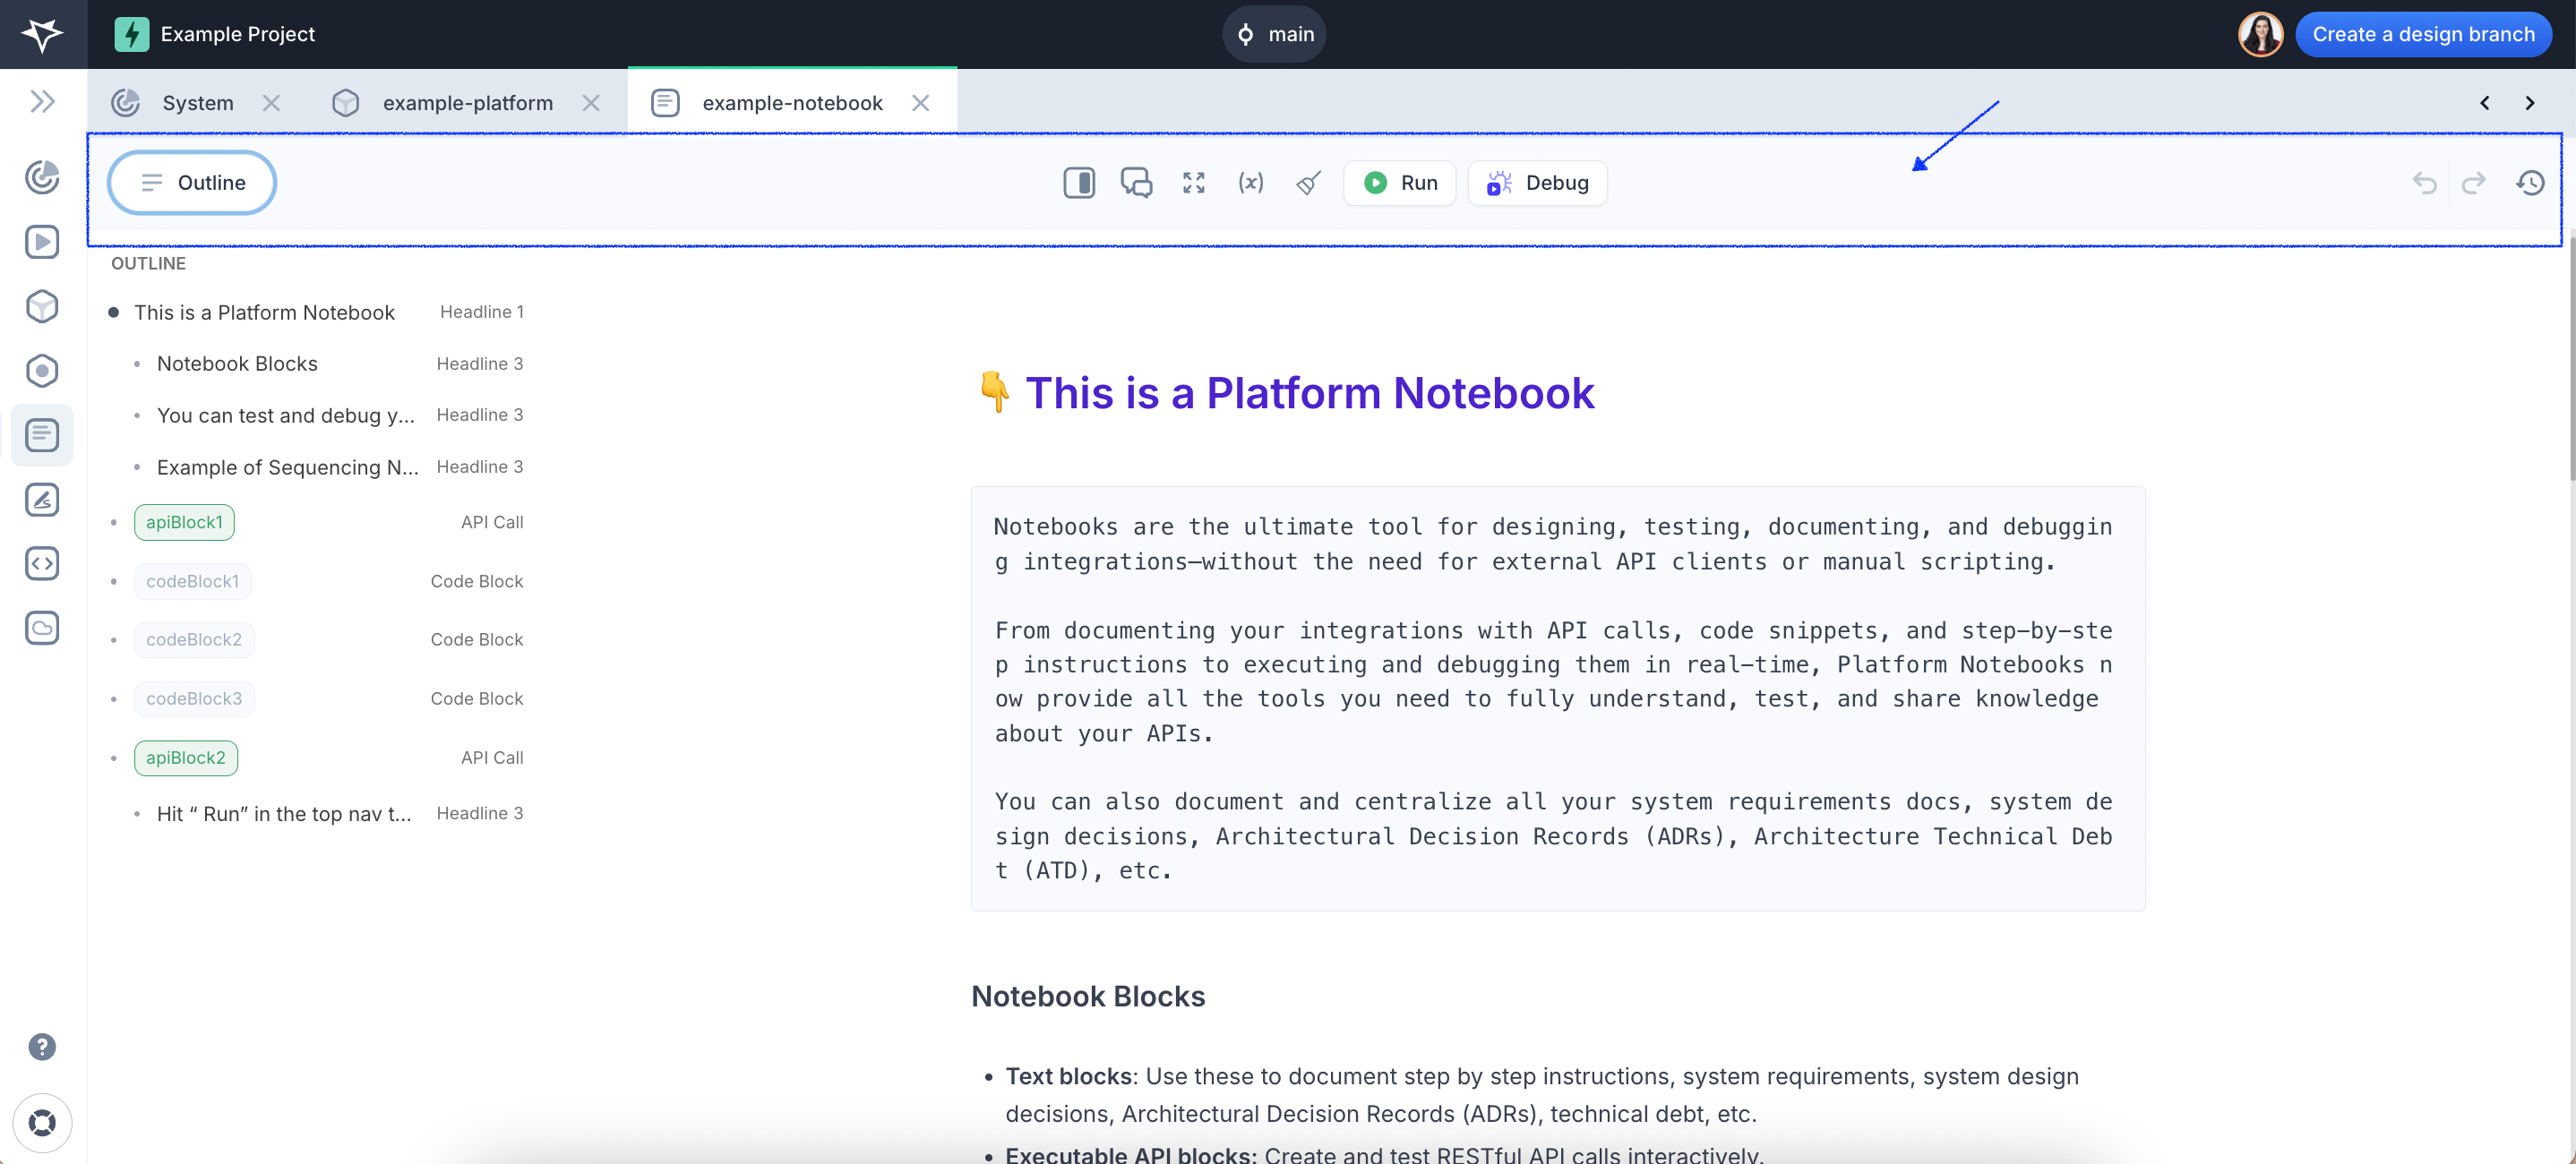
Left:
- Outline Panel: A structured, toggle-able outline that makes navigating complex Notebooks seamless. Clicking an item makes it jump directly to its location.
Center:
- Open Notebook Information: Open the Notebook information panel to review and edit the Notebook name, visibility, description, tags, readme, comments, etc.
- Comments: Add a comment for your team about this Notebook.
- Expand: Expand the Notebook for full screen editing.
- Variables panel: Manage variables in one place and reference them across multiple blocks.
- Clear results: Reset and clear results from all blocks with a single action.
- Run the Executable blocks: Click "Run" to execute API or Code blocks, then click again to stop execution. If stopped, API blocks will display a "Request Canceled" error, and code blocks will show an "Execution Aborted" message.
- Live Debugging with Platform Debugger: Enable deep session replays to get full visibility into what’s happening in your backend while executing API calls and scripts.
Right:
- Undo/Redo
- Version history: Open the panel to view the previous Notebook versions and click on the ellipsis “…” button to restore a previous version.
Create Blocks
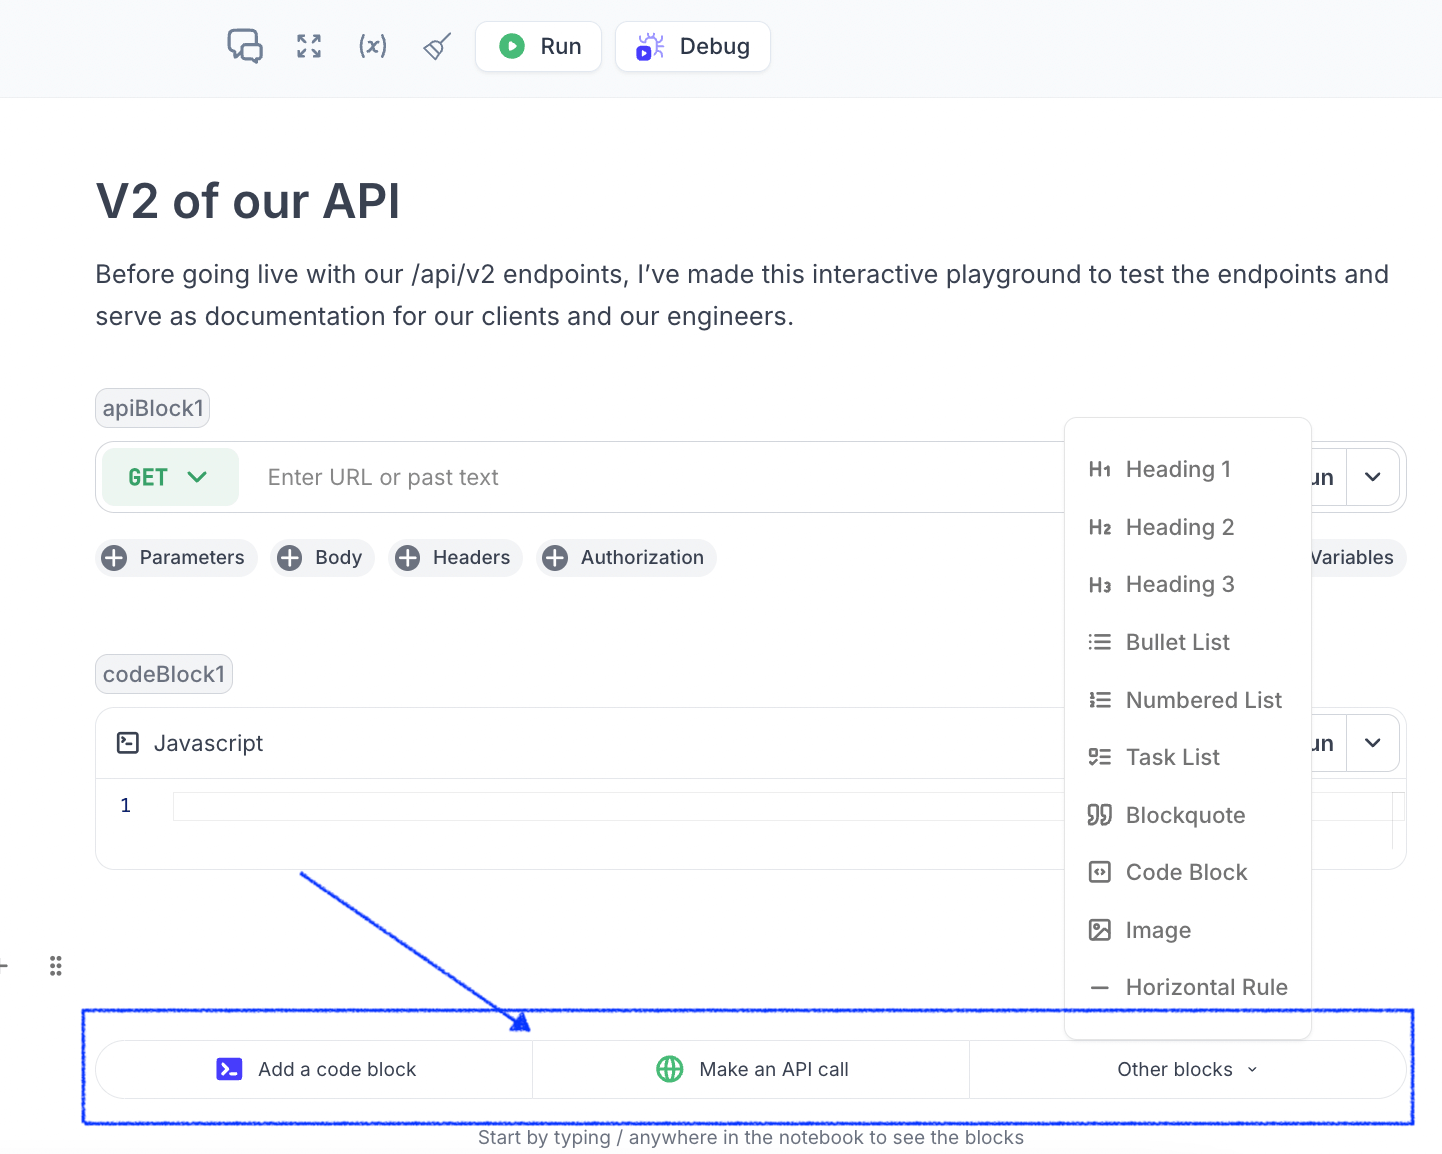
Add new blocks
You can add new blocks by:
- Clicking on the "+" button in the body of the Notebook
- Typing "/" on a new line of text
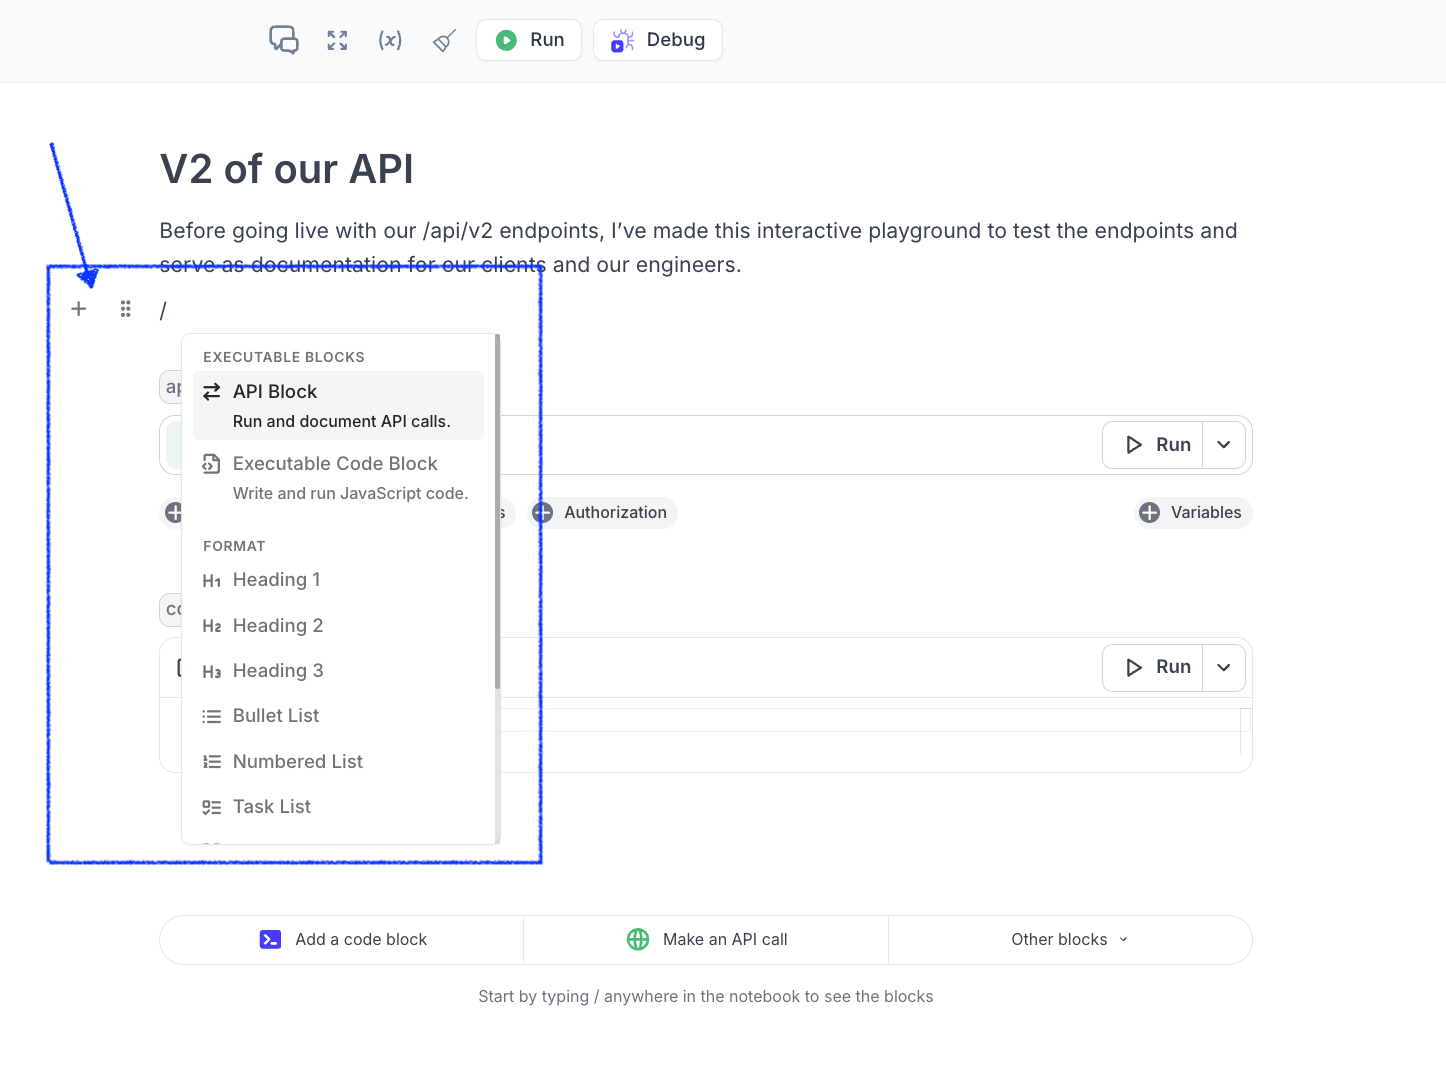
- Selecting the blocks from the toolbar in the footer
Add Executable Blocks
Executable blocks allow you to combine documentation, API calls, and code snippets and execution all in one place.
Executable Code Blocks
Executable code blocks let you execute JavaScript code and see the results inline.
-
Use the slash menu to insert a code block.
-
Write Code. The block uses Monaco Editor to provide a code-editing experience with autocompletion.
-
Click the “Run” button within the block to execute the code. The QuickJS runtime evaluates the code, and the output or errors are displayed below the block. You can stop execution at any point and, if stopped, code blocks will show an "Execution Aborted" message.
ℹ️ Pro Tip: Use results from code blocks as inputs for other API or code blocks, creating seamless data flows across your Notebook. Just mention the code block name in the relevant blocks.
Executable API Blocks
Executable API blocks let you test and document REST API calls interactively.
-
Use the slash menu to add an API block.
-
Configure the API request. Specify the method (GET, POST, etc.), URL, headers, and body directly in the block.
-
Click the “Run” button to make the request. The response is displayed below the block, showing response data and headers. You can stop execution at any point and, if stopped, API blocks will show an Request Canceled" error.
ℹ️ Pro Tip: Use results from API blocks as inputs for other API or code blocks, creating seamless data flows across your Notebook. Just mention the API block name in the relevant blocks.
Sequence Executable Blocks
Pass the output of API and code blocks into subsequent blocks, chaining operations together dynamically.
Here’s an example of how dynamic data from an API call is processed, transformed, and reused in subsequent code and API blocks within the Notebook.
apiBlock1makes an API request to a configuration service. The response from this block will be used inside a subsequent block, by referencing the block name.

codeBlock1parses the response fromapiBlock1to extract key parts like the method, host, and path.

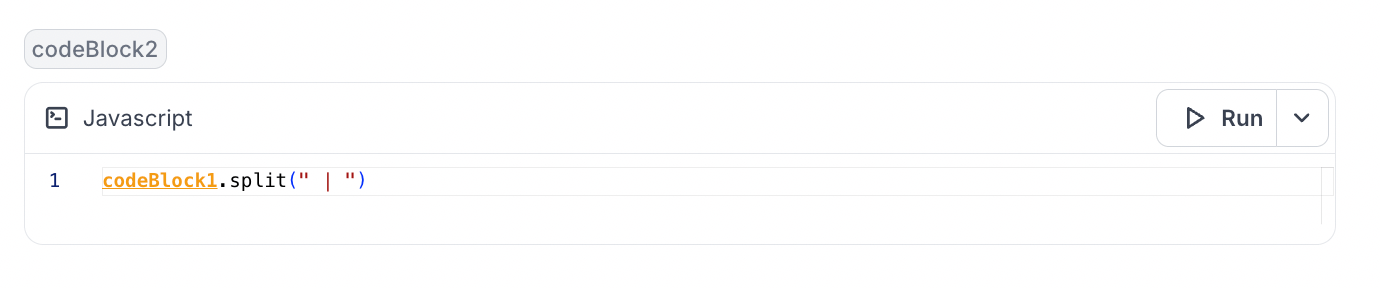
codeBlock2splits the parsed string fromcodeBlock1into an array for easier manipulation.
codeBlock3extracts the specific hostname from the processed array incodeBlock2. This hostname will be reused in the next API call.

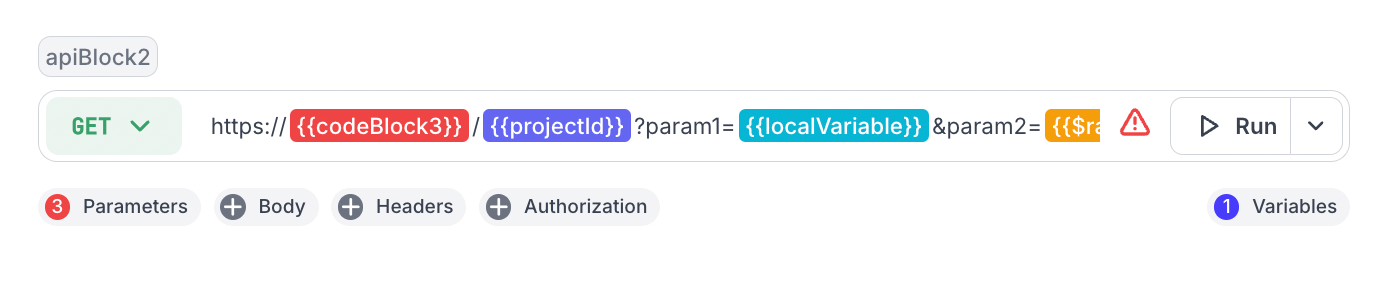
apiBlock2uses the extracted hostname incodeBlock3and other necessary parameters to make a follow-up API request to another service.
Edit Blocks
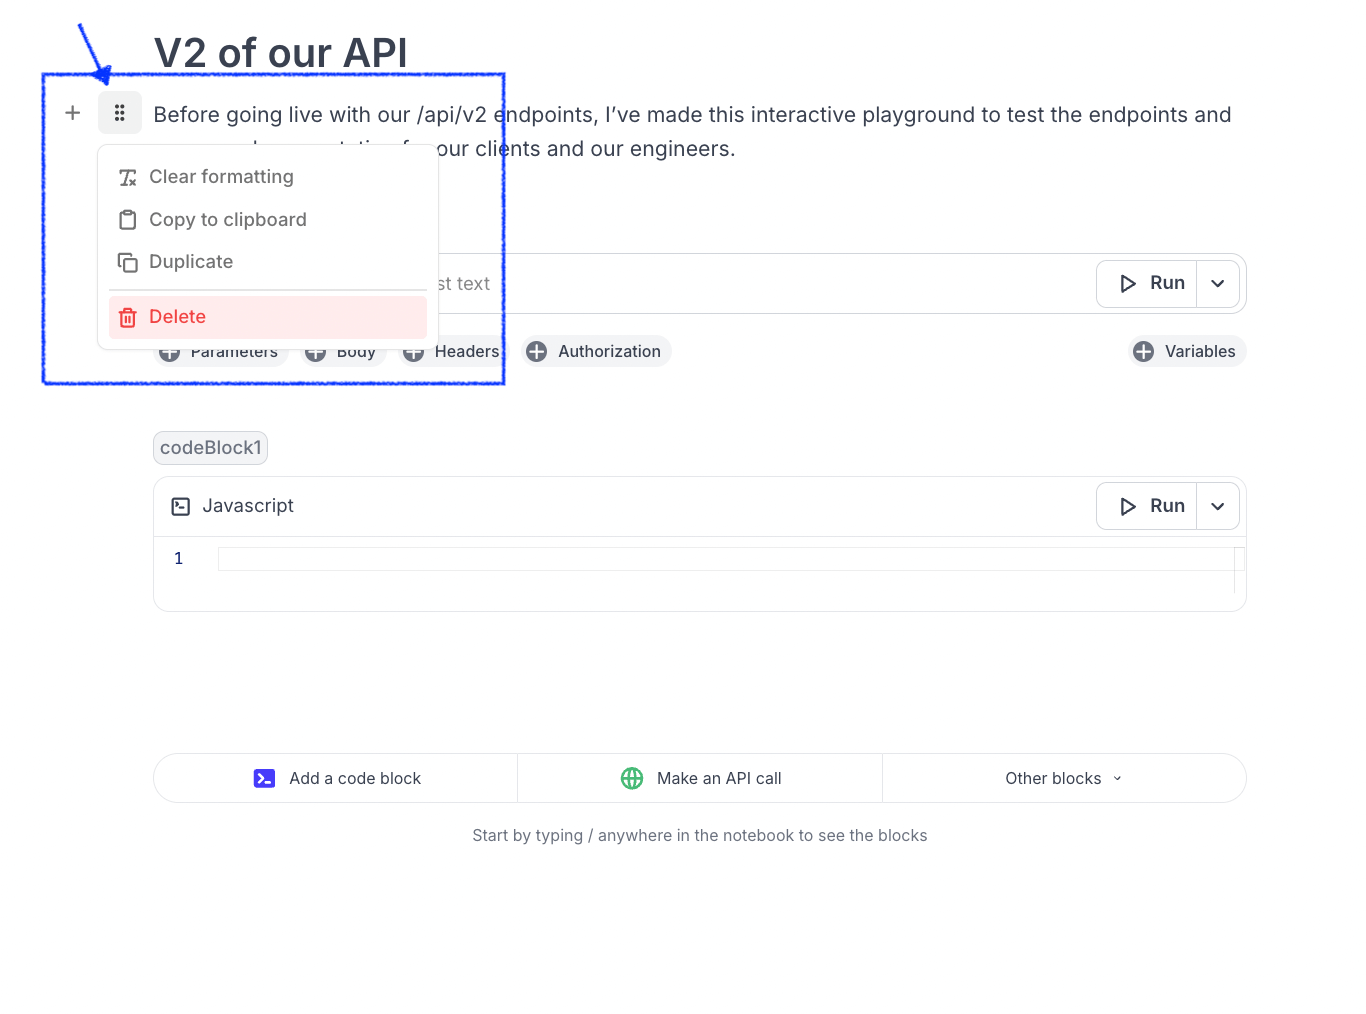
By clicking the vertical ellipsis button next to each Notebook block you can:
- Clear formatting
- Copy to clipboard
- Duplicate
- Delete
Edit Text Blocks
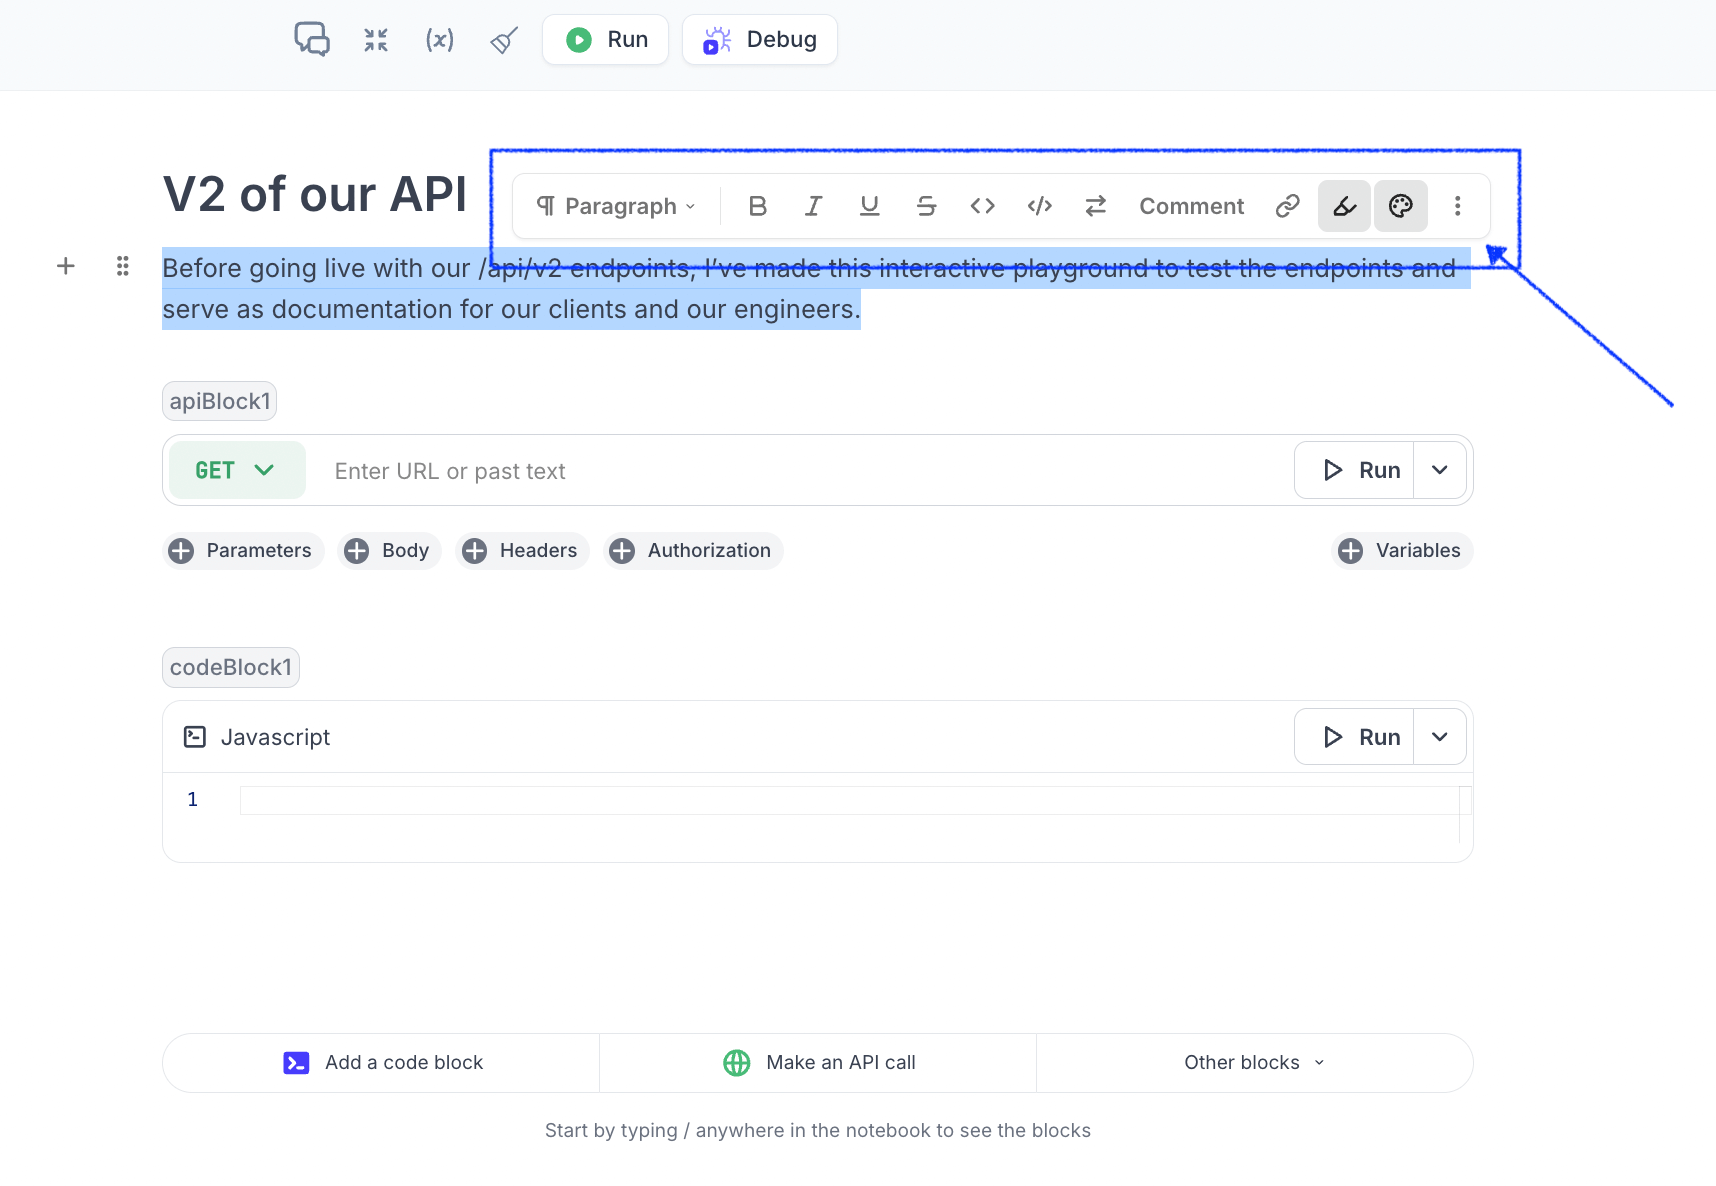
By highlighting the text in a Text Block you'll open the text editing menu where you can change the font, style, etc. of the text.
Delete a Notebook
- Open your project
- In the left-side menu, open "Notebook”
- Click on the ellipsis button “…” for the notebook you want to delete
- Select “Delete”
- Confirm your action in the prompt - please note that you can’t undo or recover deleted notebooks.
Next Steps
You did it! What’s next?