Team Collaboration
Overview
Work side by side with your team, seamlessly moving between real-time and asynchronous collaboration in a shared virtual workspace.
Design new features, communicate API changes and fix bugs without having to find a time that works in everyone’s calendar and time zone.
Teammates
Invite Your Teammates
You can invite your team to collaborate together in three ways:
(1) During the initial workspace set up
- After you have (a) named your workspace, team, and project and (b) created your first platform you will be prompted to invite your teammates
- Add their individual emails
- Select their permissions
- Select the relevant teams
- Click “Invite your team”
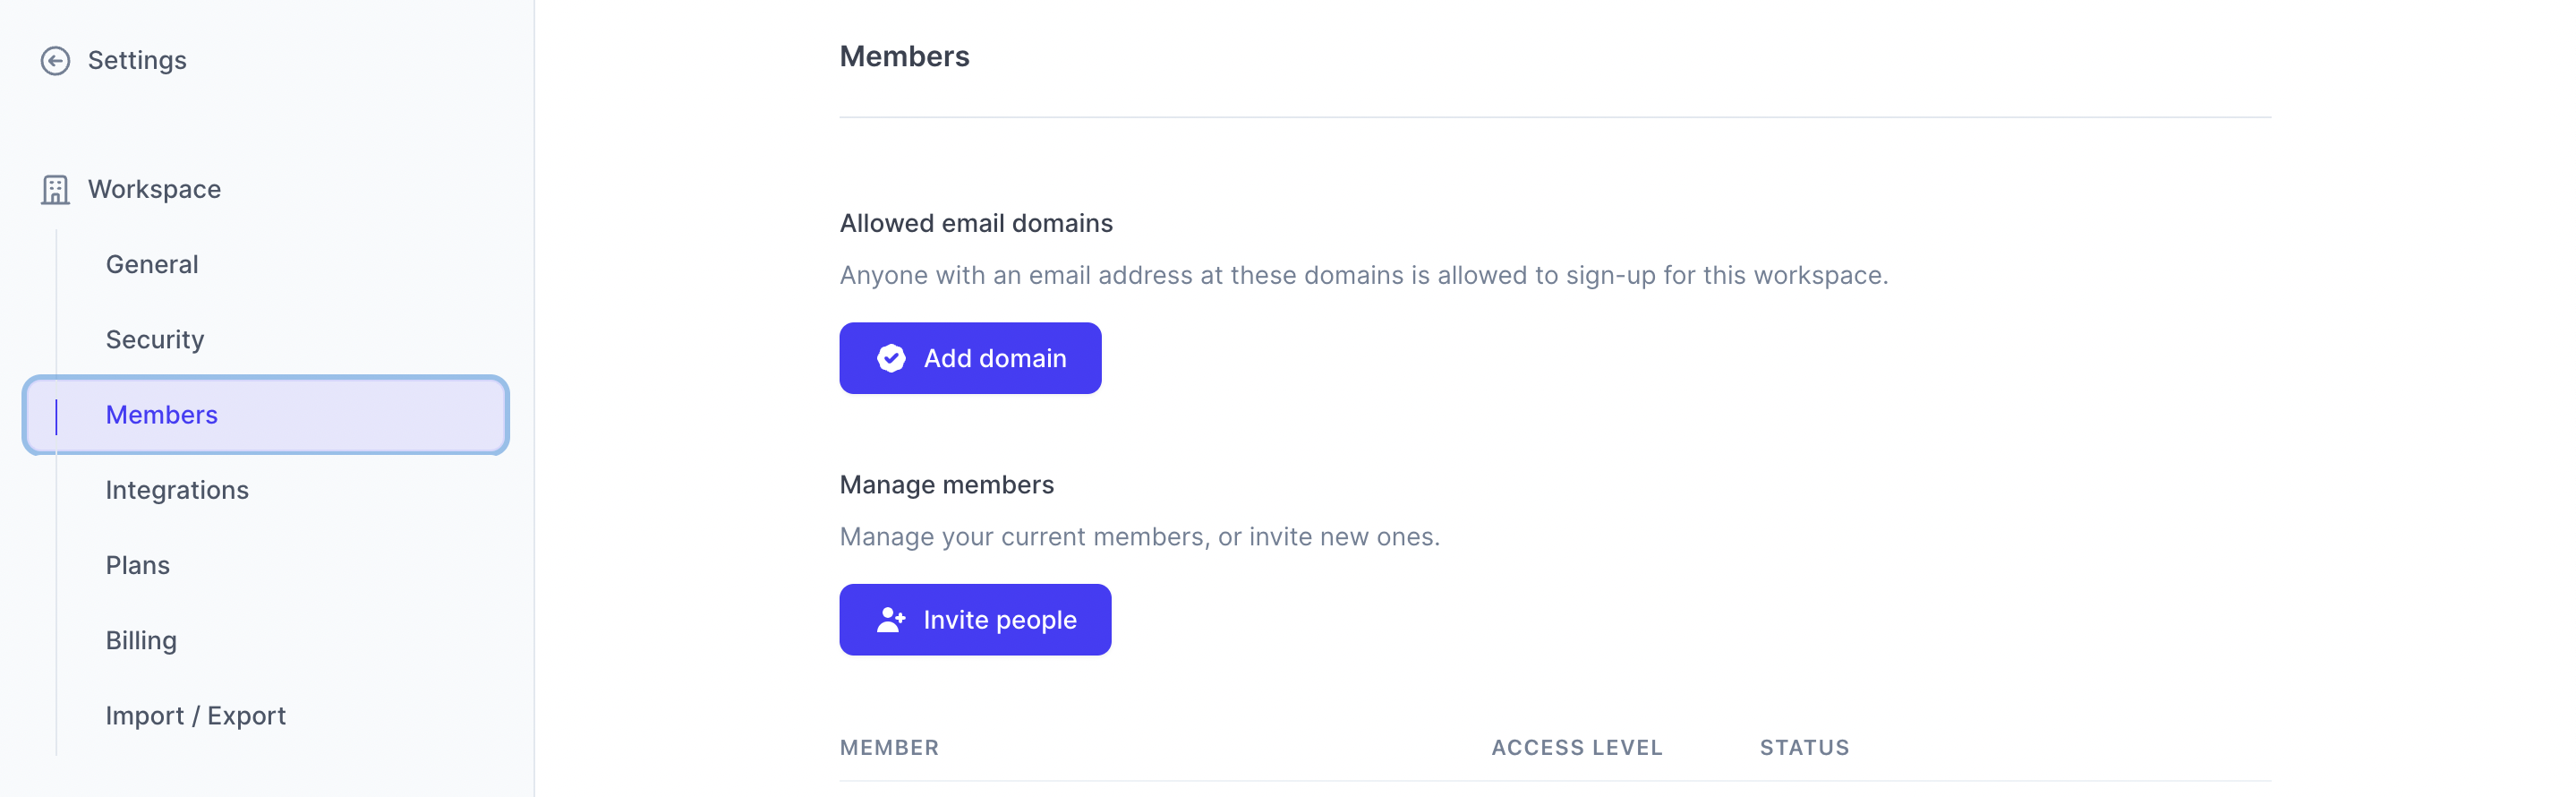
(2) Through the “Workspace Settings” > “Members” area
- From your workspace home screen, select your workspace name in the top left corner. If you’re viewing a project, you can go back to your workspace home screen by clicking the home button (Multiplayer logo in the top left corner).
- Click “Workspace Settings”
- Click “Members”
- You can waitlist a specific domain name by clicking “Add domain”. We will send you an email with a 4-digit code to validate the domain.
- You can individually invite collaborators by clicking “Invite people” and entering their email address
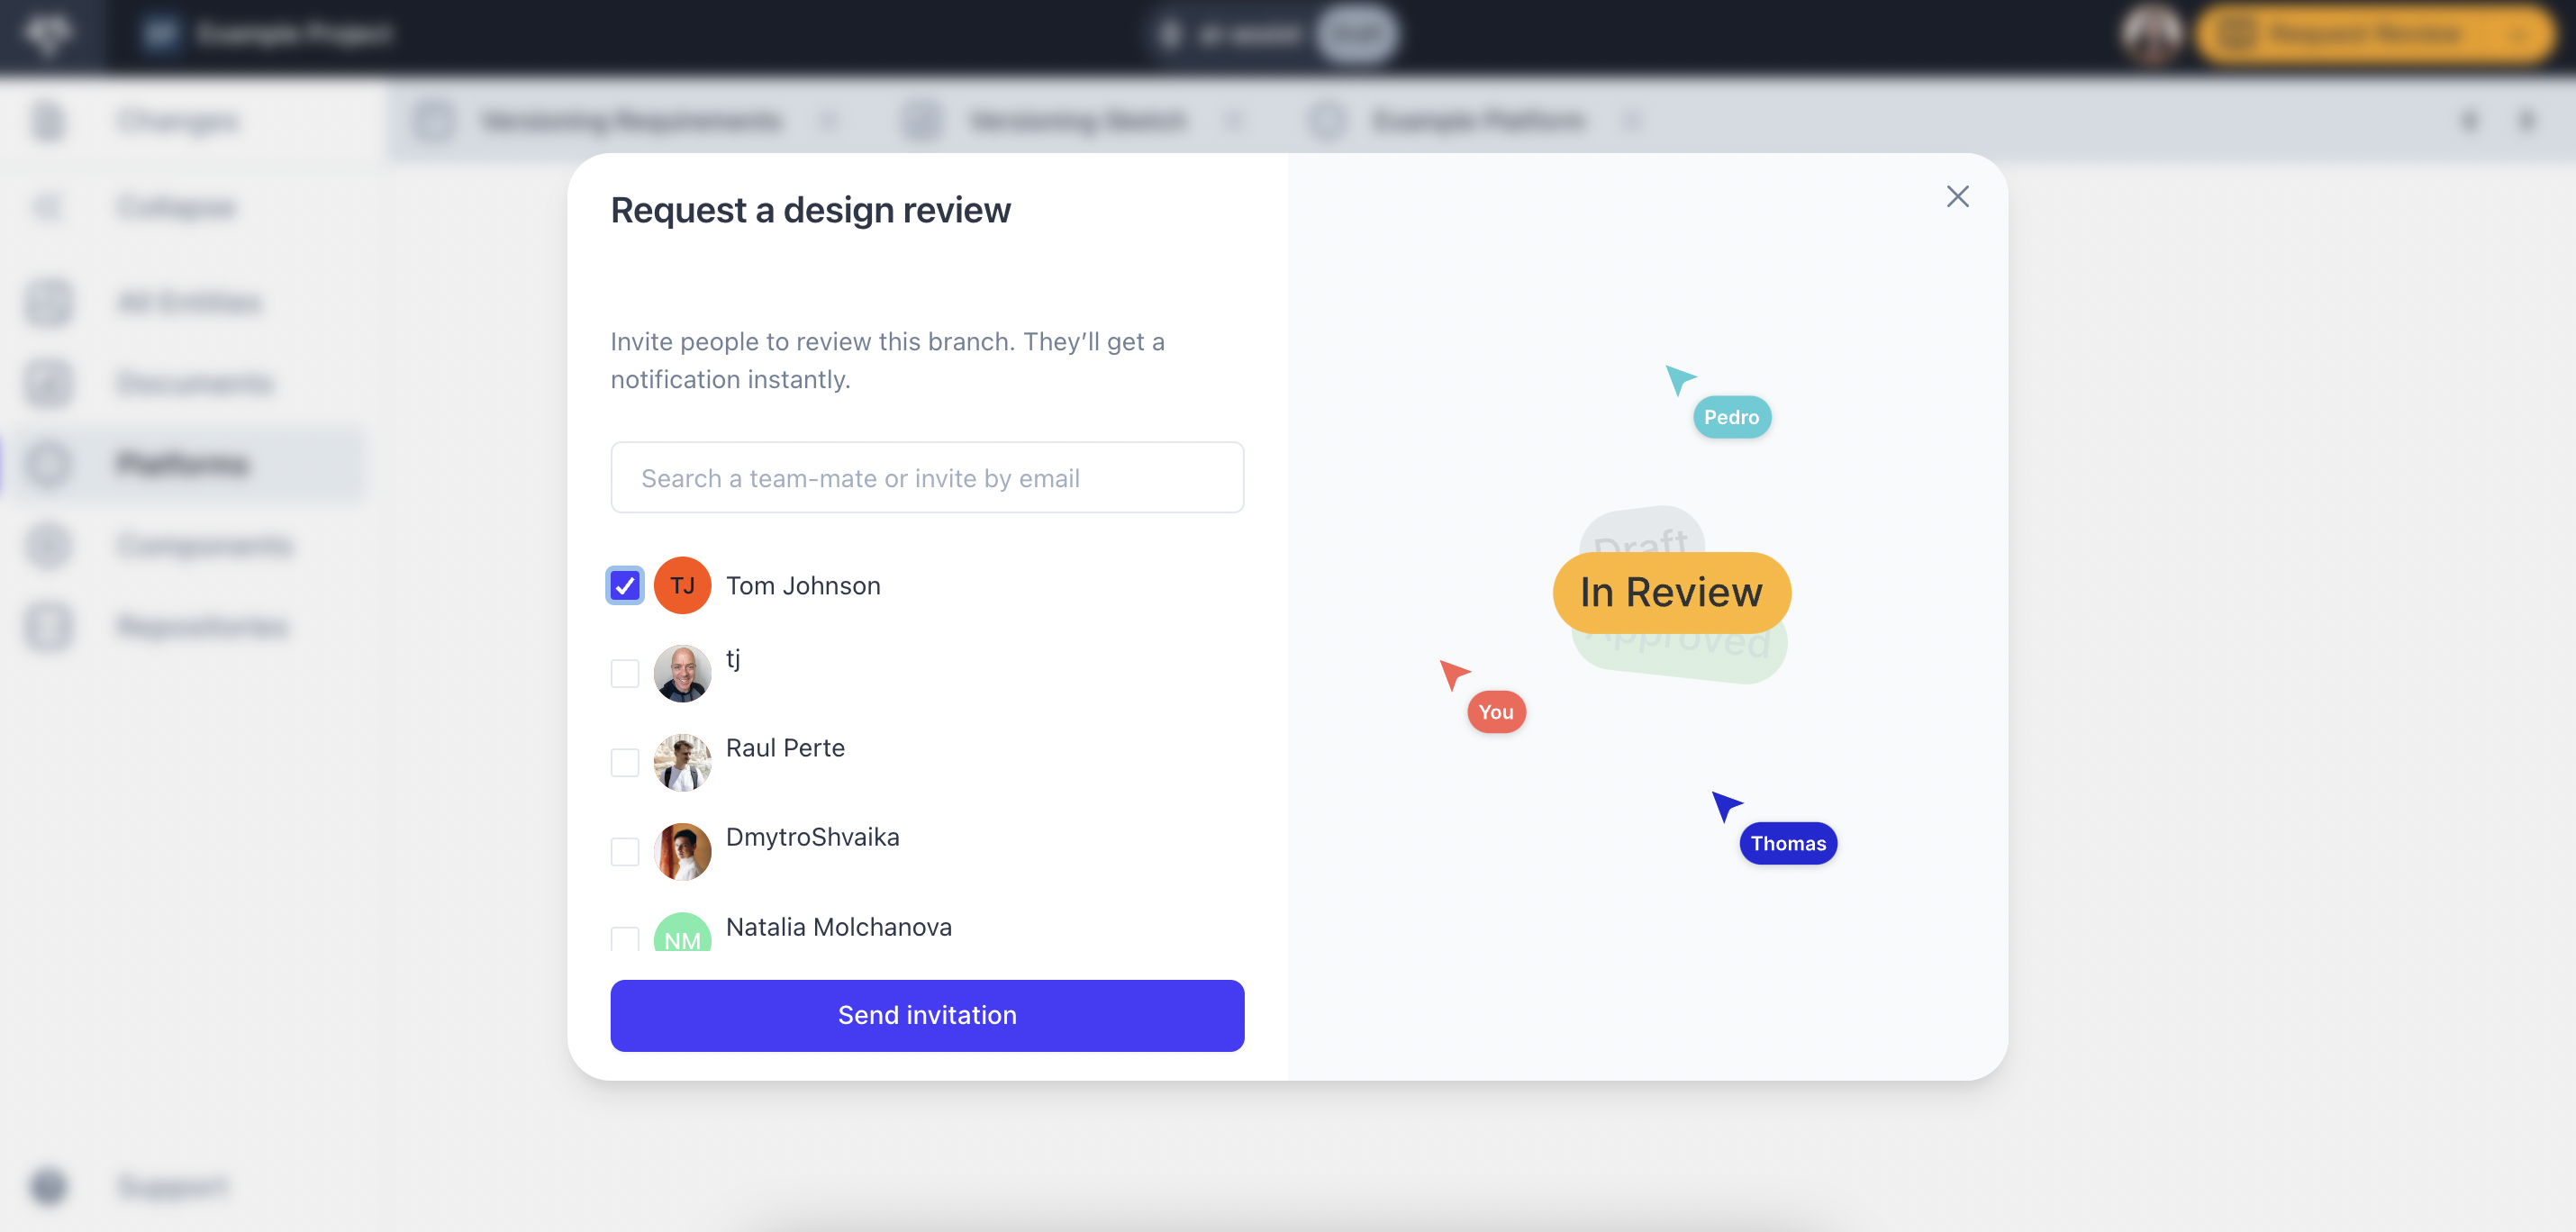
(3) When requesting a design branch review
- Create a design branch
- Request a design review
- Enter your team individual email address or select existing users from the list
- Click “Send Invitation”
Edit your Teammates’ Permissions
Currently there are only two permission levels:
- Admin
- Member
To edit user permissions:
- From your workspace home screen, select your workspace name in the top left corner. If you’re viewing a project, you can go back to your workspace home screen by clicking the home button (Multiplayer logo in the top left corner).
- Click “Workspace Settings”
- Click “Members”
- Click the ellipsis button “…” next to a user
- Select the desired permission level
Remove Teammates
- From your workspace home screen, select your workspace name in the top left corner. If you’re viewing a project, you can go back to your workspace home screen by clicking the home button (Multiplayer logo in the top left corner).
- Click “Workspace Settings”
- Click “Members”
- Click the ellipsis button “…��” next to a user
- Select “Remove member”
Teams
Create a Team
A team allows you to group together multiple users and easily manage their permissions and access. You can set up your team in two ways:
(1) During the initial workspace set up
- You will be prompted to name your workspace, team, and project
- After you’ve created your first platform, you will have the option to invite your teammates and select the relevant teams
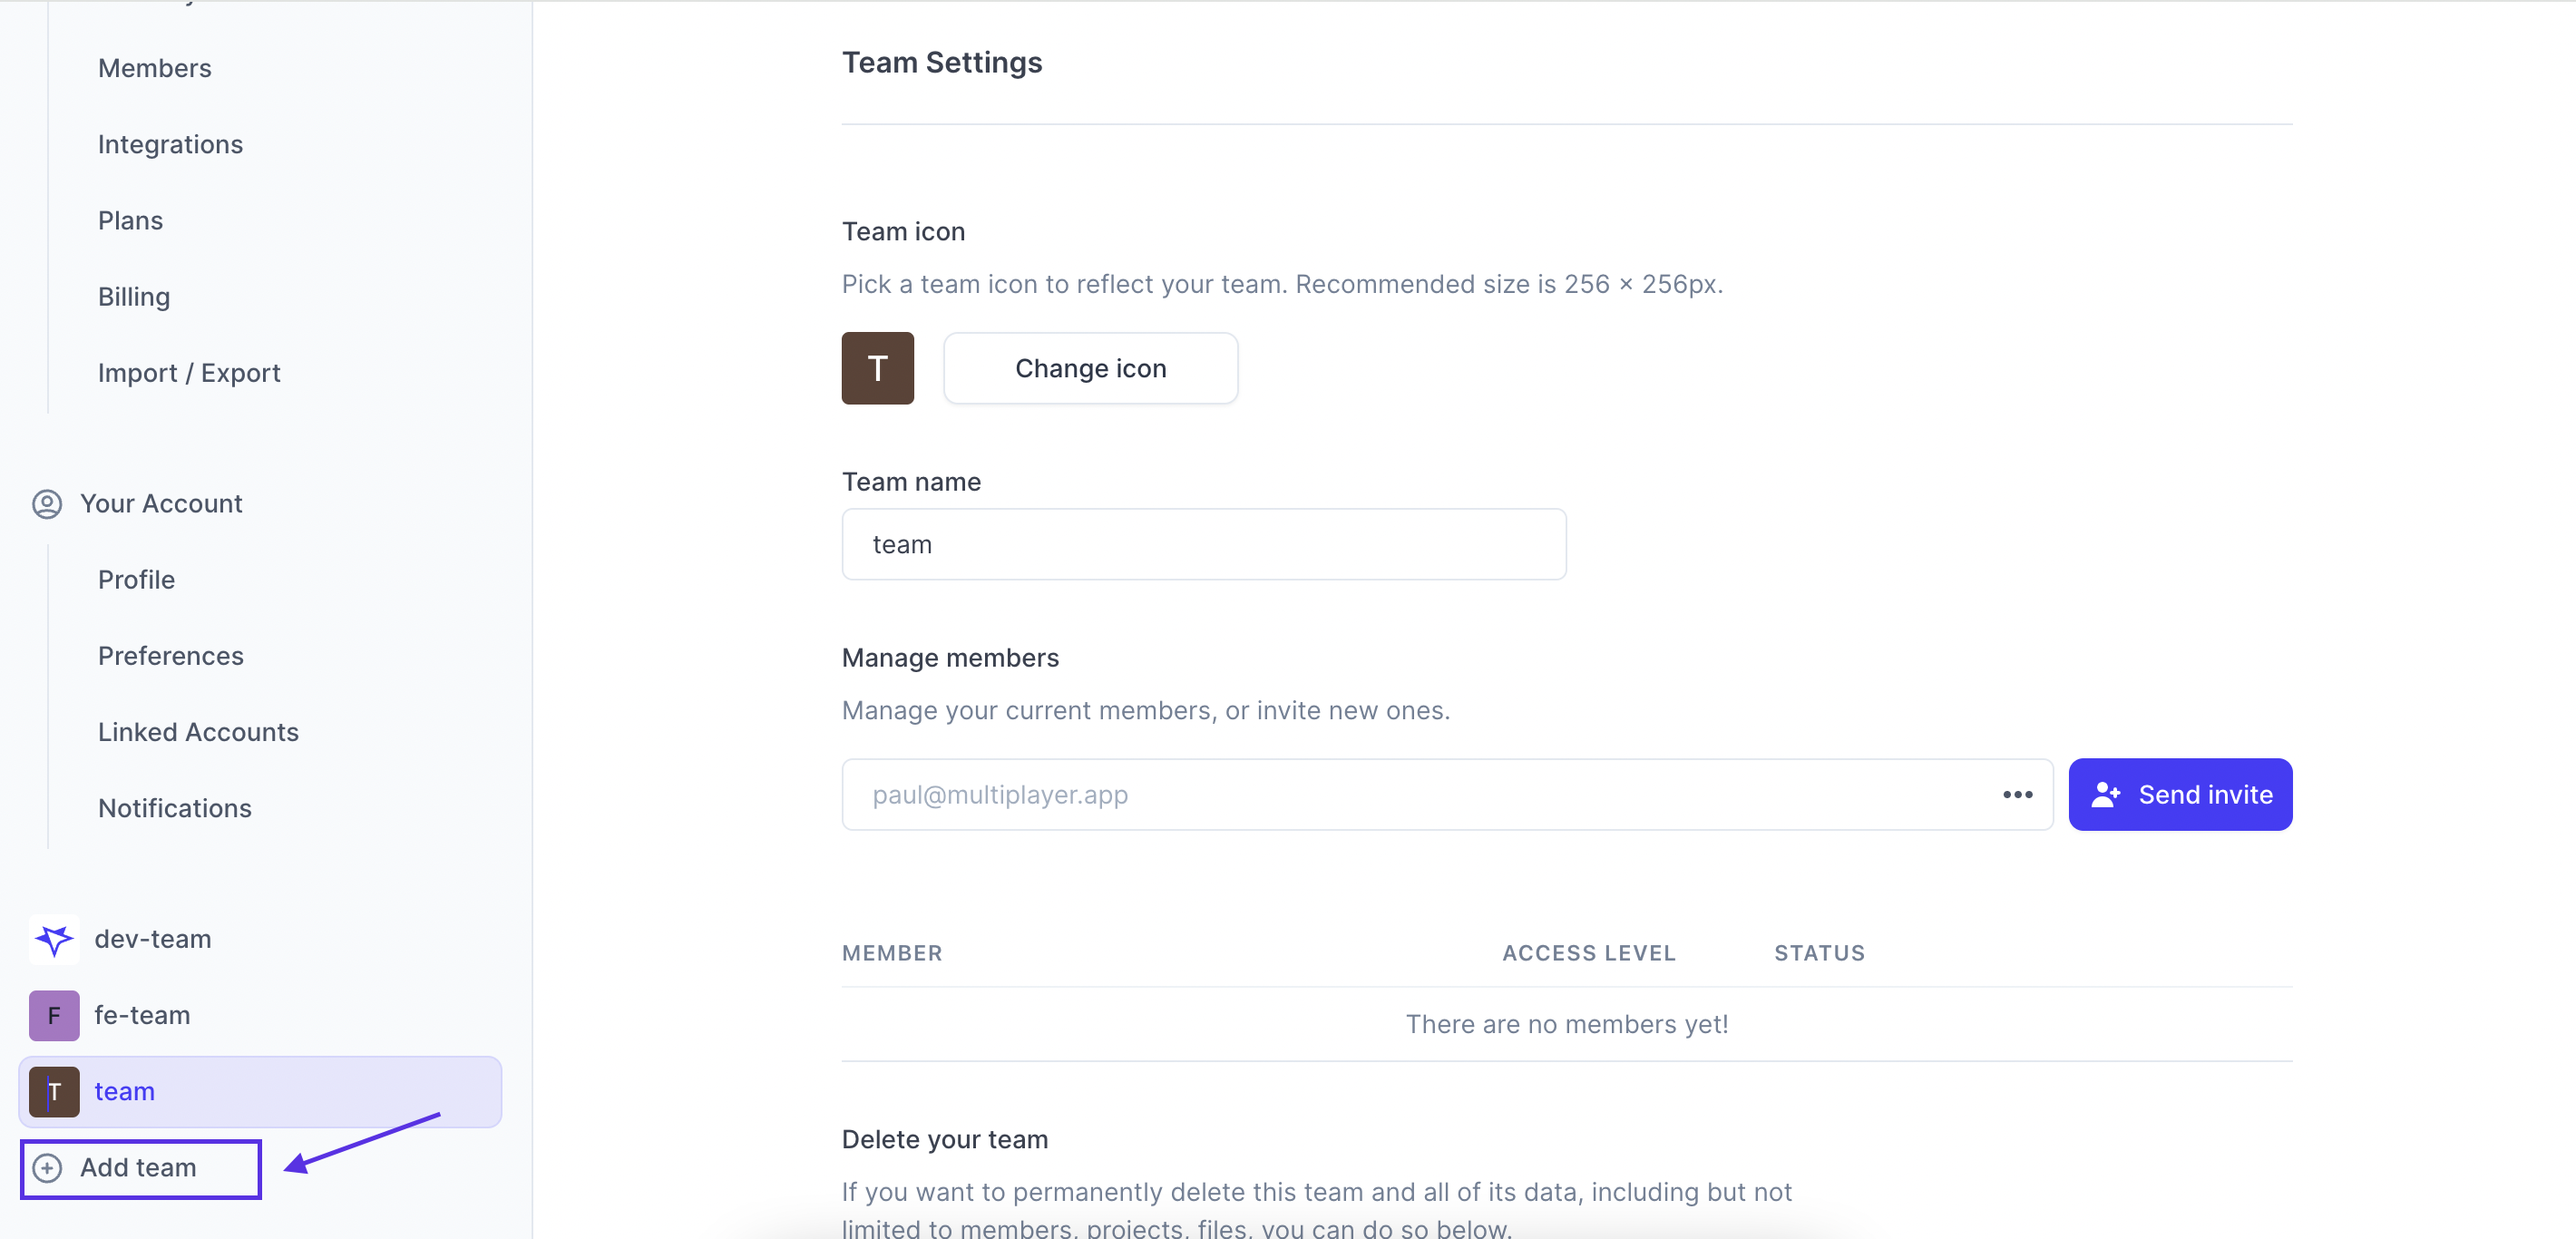
(2) Through the “Workspace Settings” area
- From your workspace home screen, select your workspace name in the top left corner. If you’re viewing a project, you can go back to your workspace home screen by clicking the home button (Multiplayer logo in the top left corner).
- Click “Workspace Settings”
- Scroll to the bottom of the left panel
- Click “+ Add Team”
- Enter your team and (optionally) a custom logo
Edit a Team
- From your workspace home screen, select your workspace name in the top left corner. If you’re viewing a project, you can go back to your workspace home screen by clicking the home button (Multiplayer logo in the top left corner).
- Click “Workspace Settings”
- Scroll to the bottom of the left panel
- Select the team you wish to edit
- You can edit the team logo, edit the team name, and manage its members
Delete a Team
- From your workspace home screen, select your workspace name in the top left corner. If you’re viewing a project, you can go back to your workspace home screen by clicking the home button (Multiplayer logo in the top left corner).
- Click “Workspace Settings”
- Scroll to the bottom of the left panel
- Select the team you wish to delete
- Scroll down and click “Delete team”
Real-time Collaboration Features
Multiplayer allows you to engage with teammates in real-time or async, allowing for immediate feedback, discussions, and decision-making.
We’re built from the group up to ensure:
(1) Realtime updates: A change made by one user will propagate to all other users instantly. You can co-edit and undo/redo any changes to your Platforms together with your team.
(2) Live playback: Each user will be able to watch in real time precisely what their collaborators’ see on their side, right down to watching each person’s cursor move about the screen (live cursors and user in-app location).
(3) Presence and status: Have an easy way to see who is online and available to work through the avatar stack.
(4) Data integrity: No data loss or conflicts even when multiple people are editing the same object at the same time.
Platform Comments
You can leave a comment on any platform in any branch.
Add a Platform Comment
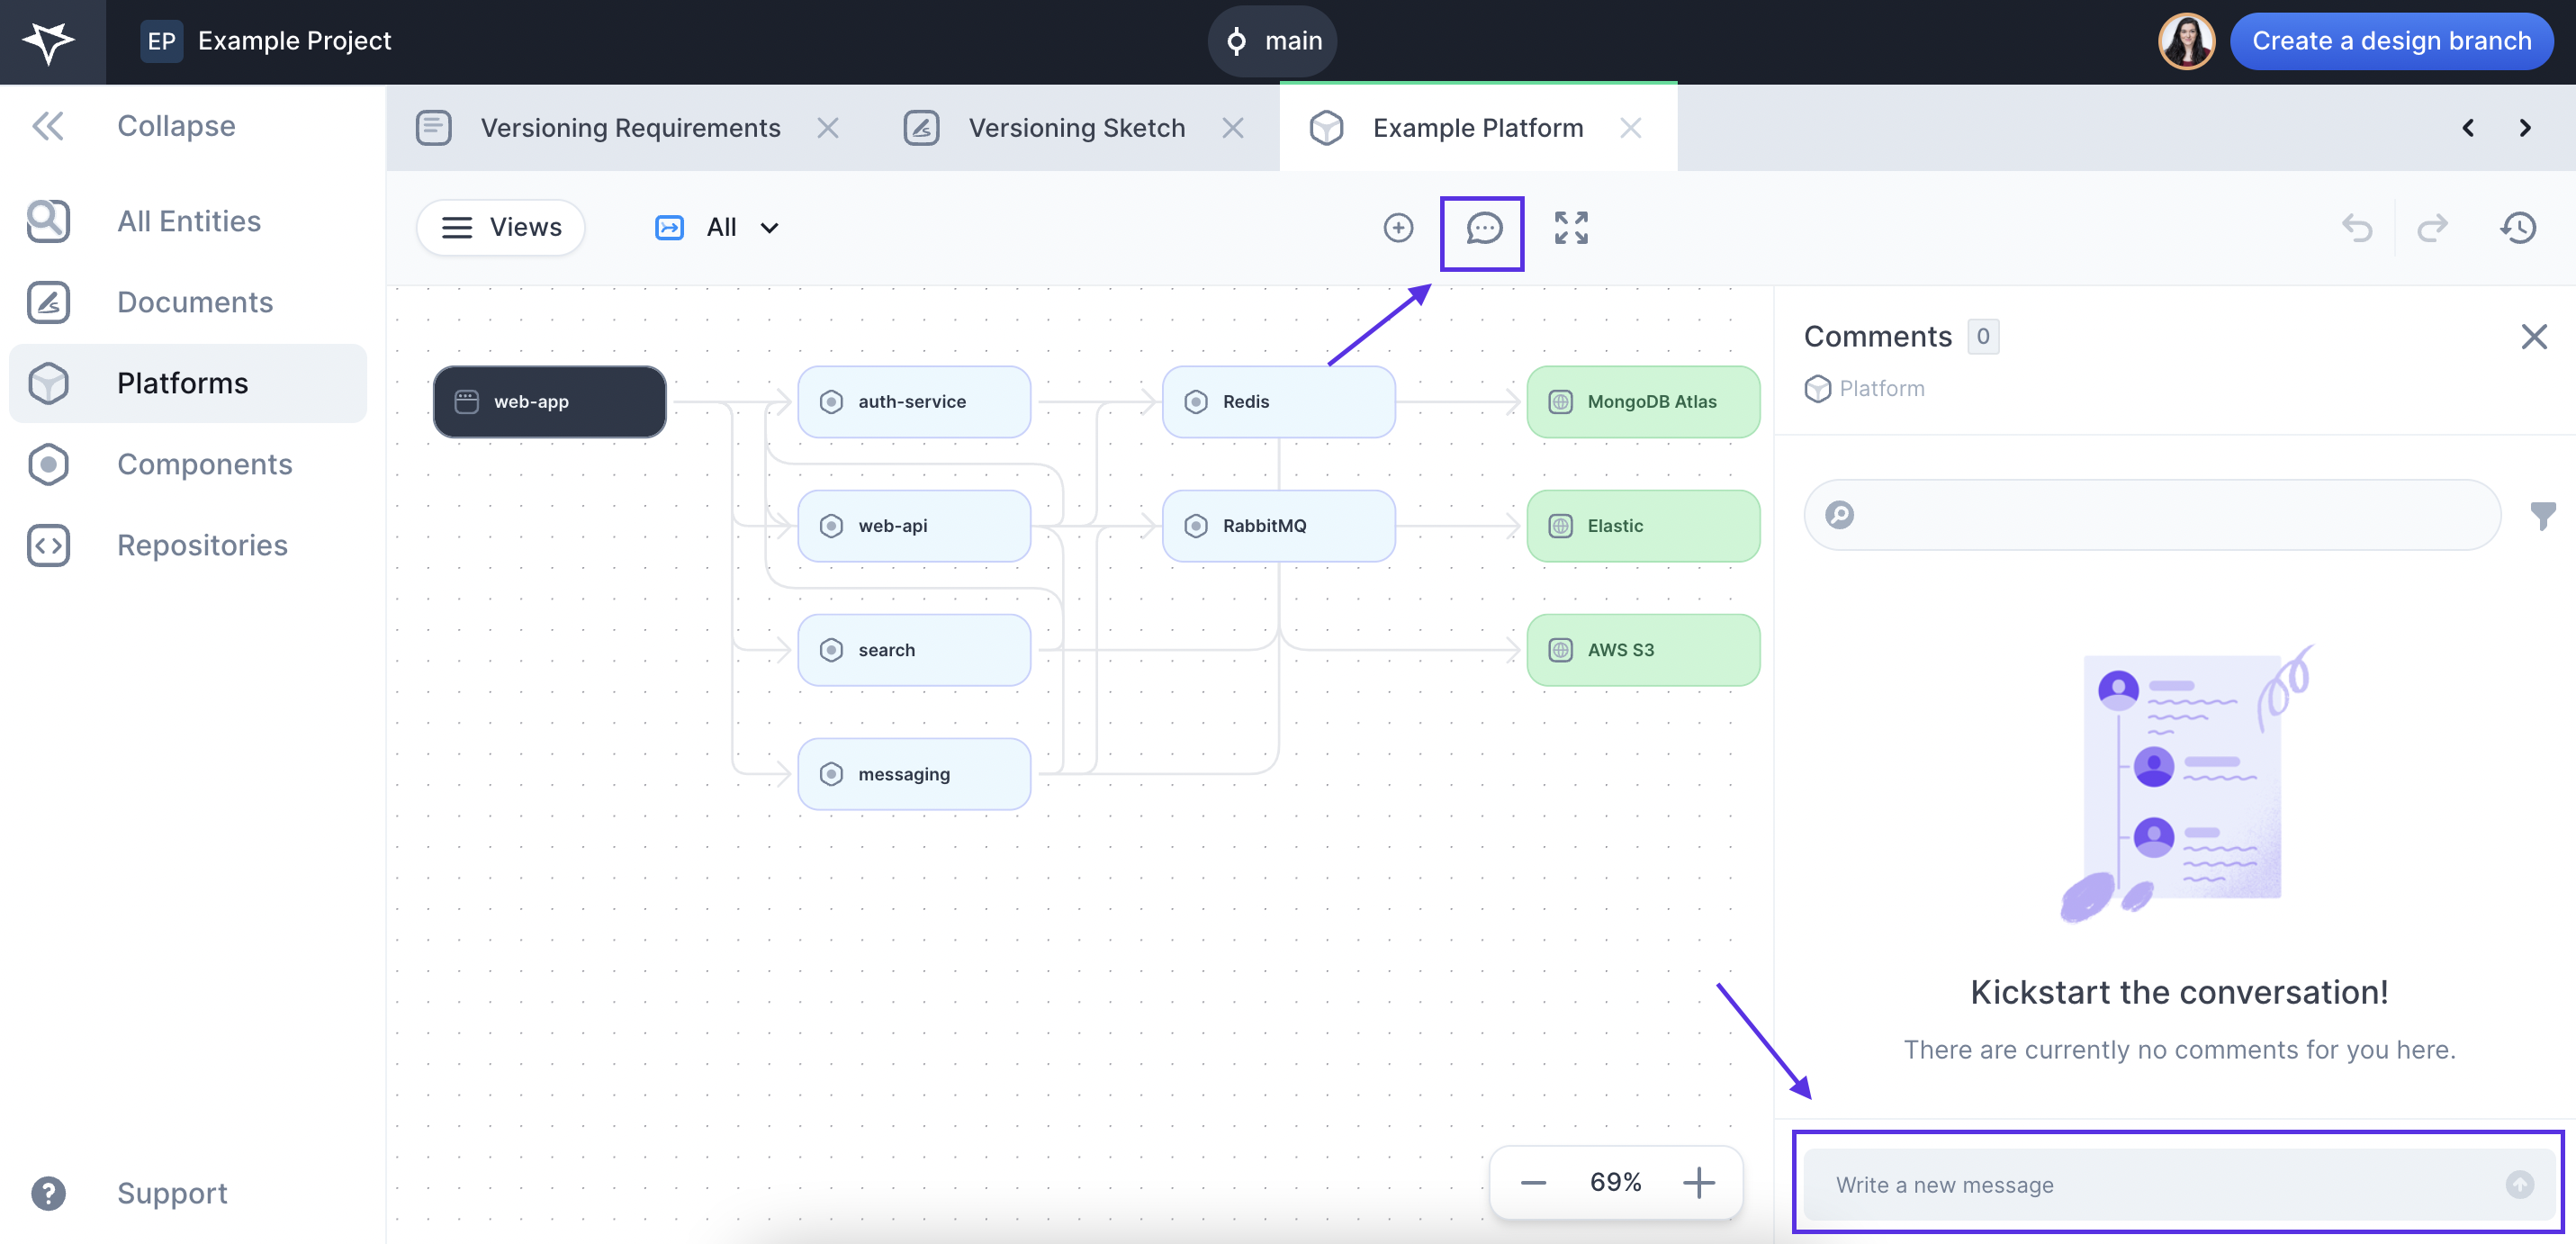
- Open your project
- In the left-side menu, open “Platforms”
- Open your desired platform
- Click the 💬 comment icon
- Type your comment and hit send or click the ⬆️ arrow icon
Delete a Platform Comment
- Open your project
- In the left-side menu, open “Platforms”
- Open your desired platform
- Click the 💬 comment icon
- Click the ✅ check button to resolve a comment or click the ellipsis button “…” next to to the comment and select “Delete”
Next Steps
You did it! What’s next?